Cloud development - All about M365, .NET, SharePoint and more…
About Me
Contact Me
  • About Me
  • Contact Me
Cloud development - All about M365, .NET, SharePoint and more…
Development, Latest, SharePoint

Using the SPO Search REST API to create a Webpart showing Recently Modified Documents containing specific keywords

SharePoint Online provides a powerful Search API that allows developers to query against SharePoint’s search index. In this blog post, we will create a custom web part that utilizes the Search API to retrieve and display the most recently modified documents matching specific keywords.

Our tool of choice for developing custom SharePoint Online web parts is the SharePoint Framework (SPFx). We will write our web part in TypeScript and use ReactJS for the front-end. To follow along, ensure you have administrative access to your SharePoint Online and Office 365 environment.

Here’s our roadmap:

  1. Setup the Development Environment
  2. Create a New SharePoint Framework Solution
  3. Develop the Web Part
  4. Deploy and Test the Web Part

Step 1: Setup the Development Environment

Firstly, we need to setup our development environment. This involves installing Node.js, Yeoman SharePoint generator, and Gulp. You can install these dependencies with the following commands:

npm install -g yo gulp
npm install -g @microsoft/generator-sharepoint

Step 2: Create a New SharePoint Framework Solution

After setting up the environment, navigate to the folder where you want to create the solution and run the following command:

yo @microsoft/sharepoint

When prompted:

  • For the solution name, enter “DocumentSearchWebPart”
  • Choose “Use the current folder” for where to place the files
  • Choose “Y” to allow tenant admin to deploy the solution to all sites immediately
  • Choose “N” for unique permissions to access web APIs
  • Choose “WebPart” as the component type
  • For the web part name, enter “DocumentSearch”
  • For the description, enter “A web part that displays recently modified documents based on search keywords”
  • For the framework, choose “React”

Step 3: Develop the Web Part

After creating the solution, navigate to the src/webparts/documentSearch/components/DocumentSearch.tsx file. This is where we’ll write the code to fetch and display documents from the SharePoint Search API.

import * as React from 'react';
import { IDocumentSearchProps } from './IDocumentSearchProps';
import { escape } from '@microsoft/sp-lodash-subset';
import { SPHttpClient, SPHttpClientResponse } from '@microsoft/sp-http';
export interface IDocumentSearchState {
  results: any[];
}
export default class DocumentSearch extends React.Component<IDocumentSearchProps, IDocumentSearchState> {
  constructor(props: IDocumentSearchProps) {
    super(props);
    this.state = {
      results: []
    };
  }
  public componentDidMount() {
    const keywords = 'your-keywords'; // replace this with your keywords
    this.props.context.spHttpClient.get(`${this.props.context.pageContext.web.absoluteUrl}/_api/search/query?querytext='FileType:docx+AND+${escape(keywords)}'&sortlist='LastModifiedTime:descending'&rowlimit=10`, SPHttpClient.configurations.v1)
      .then((response: SPHttpClientResponse) => {
        return response.json();
      })
      .then((json) => {
        this.setState({ results: json.PrimaryQueryResult.RelevantResults.Table.Rows });
      });
  }
  public render(): React.ReactElement<IDocumentSearchProps> {
    return (
      <div>
        {this.state.results.map((result, index) => {
          const cells = result.Cells.map((cell) => {
            return cell.Value;
          });
          return (
            <div key={index}>
              <h3>{cells.Title}</h3>
              <p>Last Modified: {new Date(cells.LastModifiedTime).toLocaleString()}</p>
              <a href={cells.Path}>Open Document</a>
            </div>
          );
        })}
      </div>
    );
  }
}

Here, we’re making a GET request to the SharePoint Search API, passing our query text and sort order as parameters. The query text includes the file type (docx in this case) and our search keywords, and we’re sorting the results by Last Modified Time in descending order, which will give us the most recently modified documents first. We’re limiting the results to the top 10.

Step 4: Deploy and Test the Web Part

Finally, we will deploy and test our web part.

To bundle the web part, run the following command:

gulp bundle --ship

And to package the solution:

gulp package-solution --ship

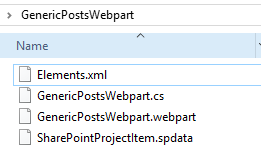
These commands create a .sppkg package in the sharepoint/solution folder. Upload this package to the SharePoint App Catalog. You can now add the web part to a page by editing the page and clicking the ‘+’ button to add a new web part.

And there you have it, a custom SharePoint Online web part that utilises the SharePoint Search API to display the most recently modified documents that match specific keywords. You can further customise this web part as needed. Happy coding!

June 4, 2023by Luke
Development, SharePoint

Creating a Custom SharePoint Online Webpart to Display Contact Details with Photos

One of the powerful capabilities of SharePoint Online is its ability to create and utilize custom web parts. These web parts can help to extend the platform’s functionalities to meet specific organizational needs. In this tutorial, we will walk you through the process of creating a custom web part that displays user contact details along with their photos.

Our web part will be created using the SharePoint Framework (SPFx), which is a page and web part model for SharePoint Online. We’ll use TypeScript for the back-end, and ReactJS for the front-end. The entire process involves the following steps:

  1. Setting up the Development Environment
  2. Creating a New SharePoint Framework Solution
  3. Developing the Web Part
  4. Deploying and Testing the Web Part

Please make sure you have administrative access to the SharePoint Online and Office 365 environment. Let’s get started.

Step 1: Setting up the Development Environment

To set up your SharePoint Framework development environment, you will need Node.js, Yeoman, and the SharePoint client-side solution generator, and Gulp. Open a command prompt and run the following commands to install these dependencies:

npm install -g yo gulp
npm install -g @microsoft/generator-sharepoint

Step 2: Creating a New SharePoint Framework Solution

Now, let’s create a new SharePoint Framework solution.

Navigate to the folder where you want to create the solution, and run the following command:

yo @microsoft/sharepoint

The Yeoman SharePoint generator will start prompting you for the following information:

  • What is your solution name?
  • Where do you want to place the files?
  • Do you want to allow the tenant admin the choice of being able to deploy the solution to all sites immediately without running any feature deployment or adding apps in sites?
  • Will the components in the solution require permissions to access web APIs that are unique and not shared with other components in the tenant?
  • Which type of client-side component to create?

For this example, choose the following:

  • Solution Name: UserContactWebPart
  • Baseline packages: Use the current folder
  • Deployment option: Select Y (Yes)
  • Permissions: N (No)
  • Component Type: WebPart
  • Web part name: UserContact
  • Description: A web part that displays user contact details
  • Framework: React

Step 3: Developing the Web Part

Navigate into the solution folder, and open the file src/webparts/userContact/components/UserContact.tsx

This file represents the frontend of your webpart.

You need to install the Microsoft Graph client library. To do this, run the following command:

npm install @microsoft/microsoft-graph-client

Now, let’s edit our UserContact.tsx file:

 --
import * as React from 'react';
import styles from './UserContact.module.scss';
import { IUserContactProps } from './IUserContactProps';
import { escape } from '@microsoft/sp-lodash-subset';
import { MSGraphClient } from '@microsoft/sp-http';
export interface IUserContactState {
  users: any[];
}
export default class UserContact extends React.Component<IUserContactProps, IUserContactState> {
  constructor(props: IUserContactProps) {
    super(props);
    this.state = {
      users: []
    };
  }
  public componentDidMount() {
    this.props.context.msGraphClientFactory
      .getClient()
      .then((client: MSGraphClient): void => {
        // get users and their photos from Microsoft Graph
        client
          .api('/users')
          .version('v1.0')
          .get((err, res) => {
            if (err) {
              console.error(err);
              return;
            }
            this.setState({ users: res.value });
          });
      });
  }
  public render(): React.ReactElement<IUserContactProps> {
    return (
      <div className={styles.userContact}>
        {this.state.users.map((user, key) => {
          return (
            <div key={key}>
              <h2>{user.displayName}</h2>
              <p>{user.mail}</p>
              <img src={`/_layouts/15/userphoto.aspx?size=L&username=${user.mail}`} alt="User photo" />
            </div>
          );
        })}
      </div>
    );
  }
}

Step 4: Deploying and Testing the Web Part

Now that our web part is developed, let’s deploy and test it.

To build and bundle your web part, run the following command in your command prompt:

gulp bundle --ship

And to package the solution, use the following command:

gulp package-solution --ship

These commands create a .sppkg package in the sharepoint/solution folder. You can upload this package to the SharePoint App Catalog in your SharePoint Online site. After uploading, you can add your web part to a page by editing the page and clicking the ‘+’ button to add a new web part. Note you’ll need to have specific permissions assigned to query Graph API.

And there you have it, a custom SharePoint Online web part that displays user contact details along with their photos. You can customize this web part further as per your needs. Happy coding!

June 3, 2023by Luke
Development, SharePoint

How to Create a Custom Wall Posts Webpart in SharePoint 2016

SharePoint is a versatile platform for building solutions that can fulfill various business needs. One such feature is the ability to create a custom webpart, a reusable component that can be included in SharePoint sites to provide specific functionality. Today, we’ll be discussing how to create a custom Wall Posts webpart for SharePoint 2016.

Before we begin, we should note that our custom wall posts webpart will be created using Visual Studio 2019, which supports development for SharePoint 2016. We will be writing in C# and using JavaScript and CSS for the front-end. Please ensure you have the necessary permissions to create and deploy custom webparts in your SharePoint environment.

Step 1: Create a New Project

Open Visual Studio 2019 and create a new project.

  • Select File … New … Project.
  • In the New Project dialog, choose Visual C# … Office/SharePoint … SharePoint Add-in. Click Next.
  • Enter a name and location for your project and click Create.
  • In the “What SharePoint site do you want to use for debugging?” box, enter the URL of the SharePoint site you’re developing against, and then choose “Deploy as a farm solution”. Click Finish.

Step 2: Add a New Web Part Item

Next, we’ll add a new web part to the project:

  • In Solution Explorer, right-click on the project, go to Add, then New Item.
  • In the Add New Item dialog, choose Visual C# … Office/SharePoint … Web Part.
  • Give it a name like “WallPostsWebPart” and click Add.

Step 3: Code Your Web Part

You will now hae a new file in your project named WallPostsWebPart. This is where you’ll write the backend code for your webpart.

using System;
using System.ComponentModel;
using System.Web.UI.WebControls.WebParts;
using Microsoft.SharePoint;
using Microsoft.SharePoint.WebControls;
using System.Text;
namespace WallPostsWebPart.WallPostsWebPart
{
    [ToolboxItemAttribute(false)]
    public class WallPostsWebPart : WebPart
    {
        // Visual Studio might automatically update this path when you change the Visual Web Part project item.
        private const string _ascxPath = @"~/_CONTROLTEMPLATES/15/WallPostsWebPart/WallPostsWebPart/WallPostsWebPartUserControl.ascx";
        protected override void CreateChildControls()
        {
            Control control = Page.LoadControl(_ascxPath);
            Controls.Add(control);
        }
        
        // Fetching the wall posts
        public string GetWallPosts()
        {
            SPSite site = new SPSite("http://YourSharepointSite");
            SPWeb web = site.OpenWeb();
            SPList list = web.Lists["Posts"]; // This should be the name of your wall posts list
            SPQuery query = new SPQuery();
            query.Query = "<OrderBy><FieldRef Name='Created' Ascending='FALSE'/></OrderBy>"; // This orders the posts by creation date, newest first
            SPListItemCollection items = list.GetItems(query);
            
            StringBuilder sb = new StringBuilder();
            foreach(SPListItem item in items)
            {
                sb.Append("<p>");
                sb.Append(item["Title"].ToString()); // Assuming "Title" field holds the post content
                sb.Append("</p>");
            }
            return sb.ToString();
        }
    }
}

Step 4: Create the Front-End

Now, we need to create a user control to represent the front-end of our webpart. This is done in the “WallPostsWebPartUserControl.ascx” file.

And that’s it! Now, you can deploy the solution to your SharePoint site and add the webpart to a page to test it.

<%@ Control Language="C#" AutoEventWireup="true" CodeBehind="WallPostsWebPartUserControl.ascx.cs" Inherits="WallPostsWebPart.WallPostsWebPart.WallPostsWebPartUserControl" %>
<div id="wallPostsContainer">
    <%: this.GetWallPosts() %> <!-- This calls the GetWallPosts method we wrote in the code-behind -->
</div>

Step 5: Deploy the Solution

To deploy your custom webpart, follow these steps:

  • In Visual Studio, on the menu, select Build … Deploy Solution.
  • After the solution has been deployed, go to your SharePoint site and open a page where you want to add the webpart.
  • Click on the Page tab and then Edit.
  • Click on the Insert tab and then Web Part.
  • In the Categories list, click Custom, find your “WallPostsWebPart”, and then click Add.

Your custom Wall Posts webpart should now be visible on the SharePoint page.

In conclusion, creating a custom webpart in SharePoint allows you to create custom functionality and provide solutions specific to your business needs. The example above showcases a simple implementation of pulling wall posts, but the possibilities are endless. You can always expand and improve the functionality based on your requirements. Happy SharePointing!

June 3, 2023by Luke
Development, SharePoint

Creating a Custom Events Calendar Webpart for SharePoint 2016

SharePoint 2016, a platform developed by Microsoft, it provides robust capabilities for collaboration and document management. This blog post will guide you through the process of creating a custom events calendar webpart for SharePoint 2016, a feature that can help manage and display various organisational events. We’ll use JavaScript, SharePoint’s Client-Side Object Model (CSOM), and SharePoint’s REST API for this task.

Prerequisites:

Before we start, you will need:

  1. Access to a SharePoint 2016 site collection.
  2. Familiarity with JavaScript, HTML, and CSS.
  3. SharePoint Designer 2013 (It’s compatible with SharePoint 2016).
  4. Basic understanding of SharePoint’s REST API and CSOM.

Step 1: Set up the Calendar List

First, we need a Calendar List. If you already have one, you can skip this step. To create a Calendar List:

  1. On your SharePoint site, click on Site Contents … Add an App.
  2. Click on the Calendar tile and give it a name then hit Create.

Step 2: Create the WebPart

Now, let’s create the custom webpart. Follow these steps:

  1. Open SharePoint Designer and connect to your site.
  2. Go to File … New … WebPart and create a new web part.
  3. Paste the following base code into the .webpart file:
<webParts>
  <webPart xmlns="http://schemas.microsoft.com/WebPart/v3">
    <metaData>
      <type name="Microsoft.SharePoint.WebPartPages.ScriptEditorWebPart, Microsoft.SharePoint, Version=15.0.0.0, Culture=neutral, PublicKeyToken=71e9bce111e9429c" />
      <importErrorMessage>Cannot import this Web Part.</importErrorMessage>
    </metaData>
    <data>
      <properties>
        <property name="Title" type="string">Custom Calendar WebPart</property>
        <property name="Description" type="string">This WebPart displays a custom events calendar.</property>
      </properties>
    </data>
  </webPart>
</webParts>

Step 3: Fetching Calendar Data with REST API

Next, we’ll use SharePoint’s REST API to fetch the calendar data. We’ll add the JavaScript code within the CDATA tags of the webpart file.

<![CDATA[
<script type="text/javascript">
  document.addEventListener('DOMContentLoaded', function(){
    var calendarListUrl = _spPageContextInfo.webAbsoluteUrl + "/_api/web/lists/getbytitle('Calendar')/items?$select=Title,EventDate,EndDate";
    fetch(calendarListUrl, {
      headers: {
        "accept": "application/json;odata=verbose"
      }
    })
    .then(response => response.json())
    .then(data => renderEvents(data.d.results))
    .catch(error => console.error('Error:', error));
  });
  function renderEvents(events){
    // Rendering code goes here
  }
</script>
]]>

This script runs when the DOM is fully loaded. It fetches calendar events and calls a function renderEvents with the events data.

Step 4: Rendering the Events

The renderEvents function will be responsible for rendering events data. We’ll use a simple HTML structure for this example, but you could use any UI library or framework. Script refused to post as text, I believe WordPress uses some of the same internal function names and tried to run it as an actual script, you’ll need to retype this!

function renderEvents(events){
  var eventsHTML = events.map(event => `
    <div class="event">
      <h3>${event.Title}</h3>
      <p>Start: ${new Date(event.EventDate).toLocaleString()}</p>
      <p>End: ${new Date(event.EndDate).toLocaleString()}</p>
    </div>
  `).join('');
  
  var calendarElement = document.getElementById('calendar');
  if (calendarElement) {
    calendarElement.innerHTML = eventsHTML;
  }
}

Step 5: Adding WebPart to a SharePoint Page

Finally, let’s add the custom webpart to a SharePoint page.

  1. Navigate to your SharePoint page and click Edit.
  2. Click on Insert … WebPart … Custom and select your custom webpart.
  3. Click on Add and your custom events calendar webpart should now appear on your page.

That’s it! You have successfully created a custom events calendar webpart for SharePoint 2016. Please note that the calendar’s appearance can be customised using CSS, and you can expand the script to include more features like event filtering, sorting, or pagination.

June 3, 2023by Luke
Development, SharePoint

Building a ‘Contacts’ web part

Ever wanted an easy way to pick people from your staff directory and display them on a page? Ever wanted to point this kind of web part at a AD security group and have it automatically display all the members? Then this web part is for you.

This is a on-premises web part, you’ll need Visual Studio and SharePoint installed to develop this. Start with a your project open and add a Visual Web Part . This doesn’t change between 2010 and 2019:

You will end up with the four standard files, note the extra CS file we’ll address that later:

So the ContactDetailsWebPart.cs looks like so:

using System;
using System.Collections.Generic;
using System.ComponentModel;
using System.Web.UI.WebControls.WebParts;
using YourNameSpaceWebParts.CONTROLTEMPLATES.YourNameSpace;
using Microsoft.SharePoint;
namespace YourNameSpaceWebParts.ContactDetailsWebPart
{
    [ToolboxItem(false)]
    public class ContactDetailsWebPart : WebPart, IWebEditable
    {
        // Visual Studio might automatically update this path when you change the Visual Web Part project item.
        private const string _ascxPath = @"~/_CONTROLTEMPLATES/15/YourNameSpace/ContactDetailsWebPartUserControl.ascx";
        public enum displayMode
        {
            BigPicture,
            SmallPicture,
            NoPicture
        }
        [WebBrowsable(true),
        WebDisplayName("Display Mode"),
        WebDescription(""),
        Personalizable(
        PersonalizationScope.Shared),
        Category("Custom Properties"),
        DefaultValue(displayMode.BigPicture)]
        public displayMode DisplayMode
        { 
            get;
            set;
        }
        [Personalizable(PersonalizationScope.Shared)]
        [WebBrowsable(false)]
        public string Contacts { get; set; }  

        #region IWebEditable Members
        EditorPartCollection IWebEditable.CreateEditorParts()
        {
            List<EditorPart> editors = new List<EditorPart> {new PeoplePickerEditor(ID)};
            return new EditorPartCollection(editors);
        }
        object IWebEditable.WebBrowsableObject
        {
            get { return this; }
        }
        #endregion

        protected override void CreateChildControls()
        {
            // Set username to current user adding Web Part by default
            if (String.IsNullOrEmpty(Contacts))
            {
                string loginname = SPContext.Current.Web.CurrentUser.LoginName;
                string[] loginnameArr = loginname.Split('\\');
                Contacts = loginnameArr[1];
            }
            ContactDetailsWebPartUserControl control = Page.LoadControl(_ascxPath) as ContactDetailsWebPartUserControl;
            if (control == null) return;
            control.wp = this;
            control.Username = Contacts;
            Controls.Add(control);
        }
    }
}

Elements.xml defines the what/where of this web part:

<?xml version="1.0" encoding="utf-8"?>
<Elements xmlns="http://schemas.microsoft.com/sharepoint/" >
  <Module Name="ContactDetailsWebPart" List="113" Url="_catalogs/wp">
    <File Path="ContactDetailsWebPart\ContactDetailsWebPart.webpart" Url="YourNameSpace.WebParts_ContactDetailsWebPart.webpart" Type="GhostableInLibrary" ReplaceContent="TRUE" IgnoreIfAlreadyExists="FALSE">
      <Property Name="Group" Value="The Intranet" />
    </File>
  </Module>
</Elements>

The web part file can be customised next, again the title and description are the parts your end users will see:

&lt;?xml version="1.0" encoding="utf-8"?>
&lt;webParts>
  &lt;webPart xmlns="http://schemas.microsoft.com/WebPart/v3">
    &lt;metaData>
      &lt;type name="YourNameSpace.WebParts.ContactDetailsWebPart.ContactDetailsWebPart, $SharePoint.Project.AssemblyFullName$" />
      &lt;importErrorMessage>$Resources:core,ImportErrorMessage;&lt;/importErrorMessage>
    &lt;/metaData>
    &lt;data>
      &lt;properties>
        &lt;property name="Title" type="string">Contact Details WebPart&lt;/property>
        &lt;property name="Description" type="string">Display integrated contact details for a selection of users.&lt;/property>
      &lt;/properties>
    &lt;/data>
  &lt;/webPart>
&lt;/webParts>

Now in Visual Studio add a new CS file, this will handle the custom logic required to handle the people picker control:

using Microsoft.SharePoint.WebControls;
using System.Web.UI.WebControls;
using System.Web.UI.WebControls.WebParts;
namespace YourNameSpace.WebParts.ContactDetailsWebPart
{
    public sealed class PeoplePickerEditor : EditorPart
    {
        private PeopleEditor _peoplePicker;
        public PeoplePickerEditor(string webPartID)
        {
            ID = "PeoplePickerEditor" + webPartID;
            Title = "Select Contacts";
        }
        protected override void CreateChildControls()
        {
            _peoplePicker = new PeopleEditor
            {
                ID = "pe1",
                AllowTypeIn = true,
                AllowEmpty = false,
                MultiSelect = true,
                Width = Unit.Pixel(250),
                SelectionSet =
                    PeopleEditor.AccountType.SecGroup.ToString() + "," + PeopleEditor.AccountType.SPGroup.ToString() +
                    "," + PeopleEditor.AccountType.User.ToString()
            };
            Controls.Add(_peoplePicker);
        }
        public override bool ApplyChanges()
        {
            EnsureChildControls();
            ContactDetailsWebPart webPart = WebPartToEdit as ContactDetailsWebPart;
            if (webPart != null)
            {
                webPart.Contacts = _peoplePicker.CommaSeparatedAccounts;
                //PickerEntity entity    
            }
            return true;
        }
        public override void SyncChanges()
        {
            EnsureChildControls();
            ContactDetailsWebPart webPart = WebPartToEdit as ContactDetailsWebPart;
            if (webPart != null)
            {
                _peoplePicker.CommaSeparatedAccounts = webPart.Contacts;
                //_peoplePicker.ResolvedEntities = webPart.Contacts;   
            }
        } 
    }
}

Now you should have a working web part if you compile and deploy your WSP package.

The title can be customised, the web part itself will show photos if you have them in your user profile service, it will show job title and phone number as well.

You can also control the picture via the web part properties. This for me seems like a nice way to automate an otherwise very manual admin task whenever a teams membership changes.

If you have role based groups setup that means your security groups for teams are automatically updated, then hooking them into this web part means your teams contact information will always be up to date!

African Grey Parrot
January 25, 2020by Luke
Development, SharePoint

Building a ‘News Posts’ web part

The idea for this web part is pretty basic, take a SharePoint out of the box Posts list such as you get from an out of the box Blog Site and point a custom web part at it to retrieve posts.

Use case could be your main Intranet news feed or on your community sites. Some additional cool bits and pieces are support for custom colours via any hex codes you care to use. Plus support for custom category filtering meaning you can put multiple copies of the web part on a page, and colour code the news based on it’s category!

This is a on-premises web part, you’ll need Visual Studio and SharePoint installed to develop this. Start with a your project open and add a Visual Web Part . This doesn’t change between 2010 and 2019:

Call it whatever you like. You’ll end up with four files:

Start with the C# file. We are basically just capturing our custom properties that we want to be able to set in the web part by the end user:

using System.ComponentModel;
using System.Web.UI.WebControls.WebParts;
using YournameSpace.WebParts.CONTROLTEMPLATES.Your.Namespace;
namespace YournameSpace.WebParts.GenericPostsWebpart
{
    [ToolboxItem(false)]
    public class GenericPostsWebpart : WebPart
    {
        [WebBrowsable(true),
        WebDisplayName("Enter Site URL"),
        WebDescription("Enter the server relative path to the site containing your posts list"),
        Personalizable(
        PersonalizationScope.Shared),
        Category("Custom Properties"),
        DefaultValue("")]
        public string siteurl
        {
            get;
            set;
        }
        [WebBrowsable(true),
        WebDisplayName("Enter List Name"),
        WebDescription("Enter the name of the list that you want to display posts from"),
        Personalizable(
        PersonalizationScope.Shared),
        Category("Custom Properties"),
        DefaultValue("Posts")]
        public string listname
        {
            get;
            set;
        }
        [WebBrowsable(true),
        WebDisplayName("Enter Post Limit"),
        WebDescription(""),
        Personalizable(
        PersonalizationScope.Shared),
        Category("Custom Properties"),
        DefaultValue("3")]
        public string postlimit
        {
            get;
            set;
        }
        [WebBrowsable(true),
        WebDisplayName("Enter Category (if required)"),
        WebDescription("Leave blank to show all"),
        Personalizable(
        PersonalizationScope.Shared),
        Category("Custom Properties"),
        DefaultValue("")]
        public string category
        {
            get;
            set;
        }
        [WebBrowsable(true),
        WebDisplayName("Title Link Colour"),
        WebDescription("Enter the hex colour value to use for the news titles"),
        Personalizable(
        PersonalizationScope.Shared),
        Category("Custom Properties"),
        DefaultValue("#00ACB8")]
        public string linkColour
        {
            get;
            set;
        }

        // Visual Studio might automatically update this path when you change the Visual Web Part project item.
        private const string _ascxPath = @"~/_CONTROLTEMPLATES/15/Your.Namespace/GenericPostWebpartUserControl.ascx";
        protected override void CreateChildControls()
        {
            GenericPostWebpartUserControl control = Page.LoadControl(_ascxPath) as GenericPostWebpartUserControl;
            if (control != null)
            {
                control.wp = this;
                control.wpContainerGUID = ClientID;
                control.siteurl = siteurl;
                control.listname = listname;
                control.postlimit = postlimit;
                control.category = category;
                control.linkColour = string.IsNullOrEmpty(linkColour) ? "#00ACB8" : linkColour;
                Controls.Add(control);
            }
        }
    }
}

Your elements XML file is next up, all you really need to do is set the group and title properties to what you want:

&lt;?xml version="1.0" encoding="utf-8"?>
&lt;Elements xmlns="http://schemas.microsoft.com/sharepoint/" >
  &lt;Module Name="GenericPostsWebpart" List="113" Url="_catalogs/wp">
    &lt;File Path="GenericPostsWebpart\GenericPostsWebpart.webpart" Url=" YournameSpace.WebParts_GenericPostsWebpart.webpart" Type="GhostableInLibrary">
      &lt;Property Name="Group" Value="Custom" />
      &lt;Property Name="Title" Value="Generic Posts" />
    &lt;/File>
  &lt;/Module>
&lt;/Elements>

The webpart file can be customised next, again the title and description are the parts your end users will see:

&lt;?xml version="1.0" encoding="utf-8"?>
&lt;webParts>
  &lt;webPart xmlns="http://schemas.microsoft.com/WebPart/v3">
    &lt;metaData>
      &lt;type name="YournameSpace.WebParts.GenericPostsWebpart.GenericPostsWebpart, $SharePoint.Project.AssemblyFullName$" />
      &lt;importErrorMessage>$Resources:core,ImportErrorMessage;&lt;/importErrorMessage>
    &lt;/metaData>
    &lt;data>
      &lt;properties>
        &lt;property name="Title" type="string">GenericPostsWebPart&lt;/property>
        &lt;property name="Description" type="string">Displays blog type articles from any list&lt;/property>
      &lt;/properties>
    &lt;/data>
  &lt;/webPart>
&lt;/webParts>

This should get you a working web part that you can deploy to your test environment. What will it look like? What per-requisites is this web part expecting? First you’ll want a test site, with a subsite setup I’ve called mine ‘News’. This subsite was made ‘Blog’ template so it has a ‘Posts’ list already but you can just create one manually if you like.

Now on the parent site (not the ‘News’ subsite) add to any page your custom web part and configure it!

Site URL should be relative so something like /community/mysite/news

List name should be ‘Posts’ if you are using the out of the box Blog Site template otherwise point it at whatever custom list you created using that content type.

The post limit can be whatever you like 1 to 3 is usually good.

Category is actually just looking at the out of the box category column, use it to filter your news posts if you like. Works well with the colour coding.

Link colour is expecting a HEX colour code. Any HEX colour code will work.

What does this all result in? A neat little summary web part like so (text truncated):

The articles are clickable and open in a modal dialog, they provide all the social likes and comments functionality you get with the ‘Posts’ list and SharePoint 2013 and newer.

The modal dialogs contain the full article, the buttons show only if you have edit rights (these are custom and will be covered in another article):

At the bottom of each modal dialog your users can like and comment on these posts.

So there you have it, a simple re-usable generic posts web part. Use it however you will. The screenshots were done using a custom master page, the modal dialogs that open are also not the out of the box ones they’ve been customised too. I’ll hopefully write up all of that and how it works in the future.

A bird in a zoo in Athens, Greece! Enjoy.

Thanks for reading my blog posts, they are really just a way to capture what I do in day to day life.

October 11, 2019by Luke
Development, SharePoint

SharePoint Event Receiver Before and After Properties

When working with SharePoint lists and document libraries it’s easy to forget what properties exist when working with event receivers. This really only applies to those still writing on-premises C# code!

SharePoint List

ListBeforePropertiesAfterProperties properties.ListItem
ItemAddingNo ValueNew ValueNull
ItemAddedNo ValueNew ValueNew Value
ItemUpdatingNo ValueChanged ValueOriginal Value
ItemUpdatedNo ValueChanged ValueChanged Value
ItemDeletingNo ValueNo ValueOriginal Value
ItemDeletedNo ValueNo ValueNull

Lists are fairly straightforward with no before properties available.

SharePoint Document Library

LibraryBeforePropertiesAfterPropertiesproperties.ListItem
ItemAddingNo ValueNo ValueNull
ItemAddedNo ValueNo ValueNew Value
ItemUpdatingOriginal ValueChanged ValueOriginal Value
ItemUpdatedOriginal ValueChanged ValueChanged Value
ItemDeletingNo ValueNo ValueOriginal Value
ItemDeletedNo ValueNo ValueNull

Hopefully this is a useful reference to someone. I know I look this up quite often and I’m worried it will soon disappear off the face of the internet as the world forgets on-premises SharePoint.

July 5, 2019by Luke
Patching, SharePoint

SharePoint 2016 – Zero Downtime Patching

New in SharePoint 2016 it should be possible to install a CU or Service Pack without any downtime, our farms physical architecture was specifically designed to allow for this.

This includes actually installing the CU and rebooting servers!

https://docs.microsoft.com/en-us/sharepoint/upgrade-and-update/sharepoint-server-2016-zero-downtime-patching-steps

First enable the side by side upgrade functionality at the web application level, this example is patching our TEST environment (it does not recycle IIS or cause any outages). Ensure you replace the web application URLs with your own and run this from a SharePoint PowerShell prompt on a server with a farm administrator account (usually the system or installer account):

$webapp = Get-SPWebApplication https://yourservername.com.au
$webapp.WebService.EnableSideBySide = $true
$webapp.WebService.update()
$webapp = Get-SPWebApplication https://yourmysitesservername.com.au 
$webapp.WebService.EnableSideBySide = $true
$webapp.WebService.update()

The rest of this article assumes you have at least two web front ends and usually at least two other servers in your farm. Also assumes your web front ends are load balanced. Also assumes you have the CU file downloaded and ready to go on each server in the farm.

My farm consists of six servers and looks like this

  • WEB1
  • WEB2
  • APP1
  • APP2
  • CUS1
  • CUS2

First up

Remove WEB1 from the load balancer and let the connections drop. Assuming a physical load balancer of some sort such as an F5.

Cumulative Update Installation

Phase 1 – Patch install

  1. Install the patch on WEB1 now that it’s out of the load pool
    1. Reboot once the CU is installed
    1. Run warmup as required and put back into the load balancer
  • Take WEB2 out of the load balancer pool
  • Install the patch on WEB2
    • Reboot once the CU is installed
    • Run warmup as required and put back into the load balancer
  • Install the new patch on all the other servers that end with “1” so:
    • APP1
    • CUS1
  • Reboot those servers after the CU installs and verify the services on those boxes are back online in Central Admin
  • Install the new patch on all the other servers that end with “2” so:
    • APP2
    • CUS2
  • Reboot those servers after the CU installs and verify the services on those boxes are back online in Central Admin

All servers should now have the CU installed and should have been rebooted. There should have been no outages for end users. You can of course patch all “1” or all “2” boxes at the same time for faster results but it is riskier as you are down to a single APP or CUS box in case something does go wrong during the patching. Doing the front ends first and then the other servers is a more robust way of ZDP.

What can go wrong?

I’ve noticed occasionally not caused by ZDP, neither will cause an outage. Sometimes SharePoint CU’s fail to restart IIS and the service is stopped, all application pools are down even though the CU was installed successfully. Just manually start the service.
 

Phase 2 – PSCONFIG upgrade

During the ZDP process, you can run Upgrade-SPContentdatabase to reduce the overall time it will take to finish running PSCONFIG. Consider this if you have a large number of databases or select large databases.

So you can run:

get-spcontentdatabase | upgrade-spcontentdatabase 

SQL doesn’t go down! Doing this first will speed up PSCONFIG.

WEB2 should be out of the load balancer!

  • In TEST the Distributed Cache runs on WEB1 and WEB2 ensure before running PSCONFIG you also gracefully remove the distributed cache via PowerShell DON’T RUN THIS ON ALL SERVERS ONLY RUN IT ON WEB2 in TEST:
Remove-SPDistributedCacheServiceInstance
  • Remove all the databases from HA using SQL Management Studio or PSCONFIG will fail
  • Next run PSCONFIG from an elevated CMD prompt

Be sure that the required commands are run one server at a time and not in parallel.

cd C:\Program Files\Common Files\microsoft shared\Web Server Extensions\16\BIN

Then:

PSCONFIG.exe -cmd upgrade -inplace b2b -wait -cmd applicationcontent -install -cmd installfeatures -cmd secureresources -cmd services -install

If WAIT proves troublesome you can use:

PSConfig.exe -cmd upgrade -inplace b2b -force -cmd applicationcontent -install -cmd installfeatures

Then via PowerShell on the WEB2 box restore the distributed cache:

Add-SPDistributedCacheServiceInstance
  • Warmup WEB2 and put WEB2 back into the load balancer pool
  • Remove WEB1 from the load balancer pool and repeat step 4 above
  • At this point WEB1 and WEB2 should be fully patched and PSCONFIG should have run successfully, both WEB boxes should be back in the load balancer and working
  • Now to run PSCONFIG on the rest of the farm in the right order, starting with all the servers that end in “1” so:
    • CUS1
    • APP1

So you’ve patched all the “1” servers, ensure in Central Admin that the services on them are in a healthy state before proceeding.

Then repeat the above process but for all servers ending in a “2”.

To reiterate be sure that the required commands are run one server at a time and not in parallel.

cd C:\Program Files\Common Files\microsoft shared\Web Server Extensions\16\BIN

Then:

PSCONFIG.exe -cmd upgrade -inplace b2b -wait -cmd applicationcontent -install -cmd installfeatures -cmd secureresources -cmd services -install

Finally finish everything by switching the side by side to the new patch number (do this on both web applications):

$webapp.WebService.SideBySideToken = <current build number in quotes, ex: "16.0.4338.1000"
$webapp.WebService.update()

e.g.

$webapp = Get-SPWebApplication https://yourservername.com.au
$webapp.WebService.SideBySideToken = "16.0.4744.1000"
$webapp.WebService.update()
$webapp = Get-SPWebApplication https://yourmysitesservername.com.au
$webapp.WebService.SideBySideToken = "16.0.4744.1000"
$webapp.WebService.update()

During this whole process https://yourservername.com.au should be available and serving pages! ZERO DOWNTIME PATCHING.

June 30, 2019by Luke

Recent Posts

  • Mastering SharePoint Online REST APIs A Step-by-Step Guide
  • Building SharePoint Online Remote Event Receivers for Document Review Flows
  • Working with SharePoint Online REST Search API 101
  • Using the SPO Search REST API to create a Webpart showing Recently Modified Documents containing specific keywords
  • Creating a Custom SharePoint Online Webpart to Display Contact Details with Photos

Categories

  • Development
  • Latest
  • Patching
  • SharePoint
  • Testing
  • Tools

“I believe in doing what you enjoy, what drives you, what keeps you coming back for more. Code is life! Well it at least it pays the bills and lets me blog about it in my spare time!”

© 2019 copyright lukeosborne.dev // All rights reserved // Privacy Policy